Installation Tutorial for Linux
QuantRocket runs on Docker, so installing QuantRocket is a two-part process:
- install Docker
- install QuantRocket
Install Docker
Visit Docker's website and follow the installation instructions for your distribution:
When finished, run Docker's hello-world container to verify the installation:
$ sudo docker run hello-worldBy default, you have to use sudo to run Docker. Forgetting to do so can result in confusing error messages, so follow the steps to allow yourself to manage Docker as a non-root user. Verify that it worked by running (without sudo):
$ docker run hello-worldYou may also want to configure Docker to start on boot.
Next, follow the instructions for installing Docker Compose on Linux .
When finished, verify your installation:
$ docker compose versionInstall QuantRocket
To install QuantRocket, download a Docker Compose file which tells Docker how to create the QuantRocket stack. A Compose file is a YAML file that defines a multi-container Docker application.
On your computer, open a terminal.
Create a folder for QuantRocket under your home directory:
$ cd ~
$ mkdir quantrocket
$ cd quantrocket
Copy and paste the following command to download the latest Compose file and save to your computer:
$ curl 'https://www.quantrocket.com/composefiles/latest/local/docker-compose.yml' -o docker-compose.yml(You can also download the Compose file from the downloads page.)
Now, use docker compose to deploy QuantRocket:
$ cd ~/quantrocket
$ docker compose -p quantrocket up -d
Docker Compose will read your docker-compose.yml, pull the images down from Docker Hub, and create and run containers from the images. This process takes 5-15 minutes. You will see output like this:
⠸ flightlog Pulling
⠸ codeload [⣿] Pulling
⠸ satellite [⣿⣿⣿⣿⣿⣿⣿⣿⣿⣿⣿⣿⣿⣿⣿⣿⣿⣿⣿⣿⣿⣿⠀] Pulling
⠸ moonshot [⣿] Pulling
⠸ license-service [⣿] Pulling
⠸ account Pulling
⠸ countdown [⣿] Pulling
⠸ dash [⣿] Pulling
⠸ blotter [⣿] Pulling
⠸ ibg1 Pulling
⠸ zipline Pulling
⠸ ibgrouter Pulling
⠸ jupyter Pulling
⠸ db [⣿⣿⣿⣿] Pulling
⠸ master [⣿] Pulling
⠸ fundamental [⣿⣿⣿⣿⣿] Pulling
You can list all the containers that are running:
$ docker psCONTAINER ID IMAGE COMMAND CREATED STATUS PORTS NAMES
d26da467ac03 bc77b14f9c3d "uwsgi-quantrocket -…" About an hour ago Up About an hour 80/tcp quantrocket-master-1
b1569b403b38 f2226cb5f6c3 "uwsgi-quantrocket -…" About an hour ago Up About an hour 80/tcp quantrocket-fundamental-1
fcf1c7b0fb36 1ca2dbd9bfd2 "uwsgi-quantrocket -…" About an hour ago Up About an hour 80/tcp quantrocket-realtime-1
952089561d20 fcade8902208 "uwsgi-quantrocket -…" About an hour ago Up About an hour 80/tcp quantrocket-history-1
...You can now access the Jupyter environment in your browser at:
You may want to bookmark this URL.
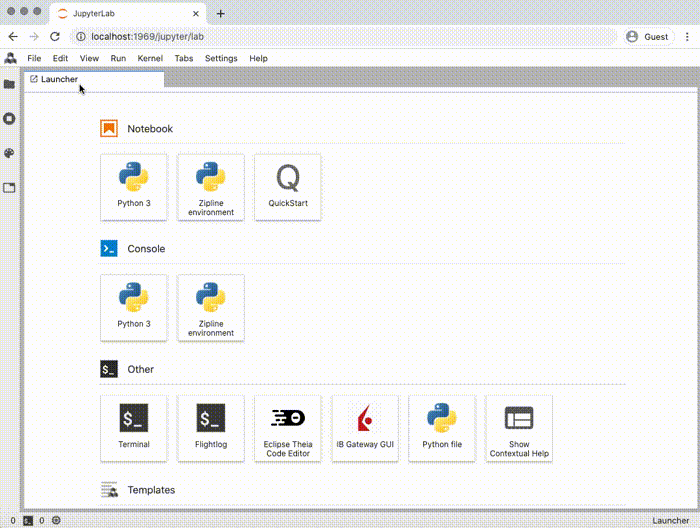
In JupyterLab you'll see the JupyterLab dashboard. Click the Quickstart button to find an interactive tour and other resources to help you get started with QuantRocket:
 Send a Message